Bin Gardening

Bin Gardening

Thursday, July 2, 2015

Wood Chip Gardening

Several months ago, I watched a documentary film about a gardener named Paul Gautschi who has discovered an organic, sustainable method of gardening. He has been a gardener for over 55 years and is considered a master arborist by his community. He has raised food for his family of 7 children, and to give away to friends. He gives numerous tours of his gardens and orchards to both local and international visitors.

The film, Back to Eden, was co-directed and co-produced by Dana Richardson and Sarah A. Zentz. The method is basically growing fruits and vegetables in wood chips, and Paul has had impressive results. After watching this film, I was very interested to try this technique and I proceeded to watch every video I could find on YouTube of people who have had success growing in wood chips.

The first step was to call our local power company to request to be on a waiting list for free wood chip delivery when they would be in our immediate area doing tree removal work. We did so and waited about one month, all the while clearing a spot for the anticipated truckload delivery. Once the chips arrived and were dumped into a tall pile, I began spreading them around with a hoe and shovel until the pile was about 2 feet high.

The pile sat from fall until spring, decomposing until it was only about one foot high. I added a bag of organic garden soil  and fertilizer where I wanted to plant zucchini and melon seeds. The seeds were planted and watered and they germinated in about a week. I continued to keep the seedlings moist until roots were established and the plants had their second or "true" leaves. There have been almost no weeds, only an occasional sapling that is easily removed. Only minimal watering is required; I have watered the plants 2-3 times this season when we have had an extended period of no rain. We have harvested zucchini a few times and are currently waiting on the melons to mature. So far, this may be my favorite way to garden! 

Here is a slide show documenting our experience in creating a wood chip garden. Hope you enjoy! 


Blessings on your gardens,

Karen

Hügelkultur and Bin Gardens, part 2: The one-year follow-up

Over a year ago, I wrote about our Hügelkultur gardening experiment and am happy to report that we had a productive year with our project. My husband and I created the garden bed in May 2014 and we enjoyed tomatoes throughout the summer, followed by a harvest of garlic and onions that grew through the winter, and now (July 2015) carrots that were planted in early spring. The bed required very little water - only when seedlings or bulbs were first planted.

Tomato plants and marigolds in Hügelkultur bed
Several weeks later
Beginning of fall - cleared tomato plants out and planted garlic
Added onions to grow through the winter
                                                                                                                                                                                                                     

Carrots growing from seed started in the spring


Garlic bulbs and cucumbers


Tomato and garlic harvest (above) from Hügelkultur bed

  Also, the deck garden with our homemade self-watering bins did well this past year. We grew  lettuce, herbs, and strawberries over the winter, and have added sweet peppers this summer.
Parsley growing throughout the winter in Georgia


Strawberries and herbs in self-watering bins 


Pepper plant growing in bin

This is the third year we have used these bins on our deck. I have added a bit of soil to each bin as needed, as well as slow-release organic fertilizer in early spring. So far, there has been no cracking and very little wear and tear on the containers (other than some color fading). Please click here for more info on making these self-watering containers.

Happy gardening to you!
Karen

Friday, May 23, 2014

Hügelkultur and Straw Bale Gardening Projects


My family recently asked what I wanted for Mother’s Day, and I replied that I would like straw bales and soil. They used to look at me strangely when I made such requests, but they now understand that May is always about gardening at our house. My husband came through in a big way – he went out to do some errands and came back in a large Home Depot rental truck with 30 bales of wheat straw and about 600 pounds of soil and mushroom compost. It was the perfect gift!

There were 2 gardening methods I had been wanting to try for awhile: Straw bale gardening and raised bed Hügelkultur gardening. This delivery gave me all I needed to get started. I decided to focus on the Hügelkultur spot first. Hügelkultur translates to “hill culture” and this method has been used in Germany for centuries. Basically, you dig a trench and fill it with wood debris of different sizes, adding green brush or any organic source of nitrogen, then add top soil, and let it “settle” for a few weeks. The branches at the foundation of the garden help retain moisture, reducing the need for irrigation, and the space between branches helps to improve drainage. As the tree branches break down over the years, nutrients are released into the soil, reducing the need for fertilizer (though extra nitrogen may be needed when the wood is first decomposing).

Here is a slideshow showing how we created these two types of gardens in our yard. In researching various ways to build the Hügelkultur beds, I visited several permaculture sites and used what I thought were the most logical ideas. For straw bale gardening advice, I read Joel Karsten’s excellent website (he is a horticulturist and author of Straw Bale Gardens).

I will post a follow-up article once the beds are planted. Hope you enjoy the slideshow!

Blessings,
Karen

Thursday, April 10, 2014

Indoor Composting using the Bokashi Method

Bokashi kit from Sunwood


Did you know there is a way to turn your kitchen scraps (including meat and dairy) and houseplant waste into an organic compost soil conditioner? It is done by a process called Bokashi (the anaerobic fermentation of organic waste) in an airtight bucket designed to prevent flies and unpleasant odors. You layer your food scraps in the bucket and add a Bokashi inoculant, usually a combination of wheat bran combined with molasses, along with “friendly” or Essential Microorganisms (EM).  The layers ferment for about 10 days, breaking down the scraps enough to add to the outdoor compost bin without attracting rodents and other vermin. This is a quick way to break down food waste and it is ultimately beneficial to the garden (and prevents all the food scraps from unnecessarily ending up in a landfill.).

Japanese farmers have used the Bokashi method for generations. Dr. Teuro Higa was an agricultural researcher from Japan who believed there was a better and more natural way to manage plant growth without relying on chemicals. He discovered Essential Microorganisms (EM) and combined EM with Bokashi, achieving excellent crop yields. In 1993, Dr. Higa wrote An Earth Saving Revolution: Solutions to Problems in Agriculture, the Environment, and Medicine, Vol. I  which describes the history and discovery of Essential Microorganisms.


I purchased the Bokashi compost kit from Sunwood which had everything needed to begin the process. Another similar product is the All Seasons Indoor Composter - a 5-gallon container made from recycled plastic soda bottles.  It has a strainer inside to allow moisture from decomposing matter to be drained into a reservoir, and there is a spigot on the front of the bucket to drain the nutrient-rich Bokashi liquid. The liquid or “tea’’ can be diluted and used as a slow-release fertilizer in the garden or as an inoculant to introduce beneficial microorganisms to the compost bin. It is recommended to have two buckets – one that stays closed and ferments for 10 days while the other is used to collect scraps.

Compost tea draining from the spigot

Plenty of compost tea to dilute for fertilizer

Dried Bokashi can be made or purchased. All Seasons has a blend by SCD Probiotics  which is advertised as a soil enhancer, compost accelerator, and odor controller. It is used as a natural means to promote germination, flowering, and fruiting in plants, as well as improving the soil environment. To make your own supply, visit the City Farmer website for some excellent instructions on homemade Bokashi.

If you want to bypass the step of finishing the decomposition process in your compost bin and add your fermented Bokashi scraps directly to your garden spot, you can bury the fermented scraps and wait a few weeks for them to fully decompose before planting. Bryan McGrath from ProKashi has made several instructional videos on improving the soil through the Bokashi method, including an introduction and follow-up on his homemade Soil Generator  – a bin or container with an open top and bottom, placed on top of bare soil for the purpose of collecting Bokashi (or regular food) scraps to complete the decomposition process without any required digging. I tried this with an 18-gallon storage bin with fair results, but really needed a higher volume of organic material to fill the bin. In my next attempt, I will take Bryan’s suggestion of using a 5-gallon bucket for a soil generator.

I use the Bokashi method off and on, when I remember to buy or make the inoculant. I love the natural cycle of using food scraps and Bokashi tea to enhance the soil to grow nutritious food without chemicals and fertilizers. I like not adding more waste to the landfill, and I am definitely for adding beneficial microbes to the garden soil. For me, it has been worth experimenting to improve the rate of composting and the harvest results.


Until next time, blessings on you and your gardens!


~Karen

Thursday, March 13, 2014

Outdoor Compost Bins


After several years of trying various composting methods, I have settled on two types of composting that work best for our household and garden size. For outdoor composting, my favorite bin is the Geobin, and for indoor composting, I use the SCD Probiotics K100 All Seasons Kit with Bokashi. In this post, I will first mention the various outdoor containers and methods that I have tried with only fair results:

We started with the simple method of having two exposed compost piles located along our fence border, about 100 feet from the garden. One pile was for smaller material such as grass clippings, leaves, ashes, straw, and plant-based food scraps; the second pile was for weeds, small twigs, and clippings from bushes – basically, things that might need longer to break down. We turned the first pile once a month. It did yield some compost, but poison ivy infiltrated the heap and we basically abandoned it. We allowed nature to take its course (no turning) with the second pile of larger organic matter which took a couple of years to decompose.

Several years ago, our local extension office sold (at a discount) cube-shaped black plastic compost bins that had some ventilation holes at the top, and a trap door at the base to release the compost that was finished. We purchased two of these bins – one for depositing current plant matter and a full bin that was left to “cook”. These containers also created some good, usable compost until fire ants (rampant in GA) found the food scraps and discovered that this shelter was a perfect place to build large mounds. The ants were resistant to our watering and turning the pile; when disturbed, they always seemed to come back in bigger numbers. We grow organically, so we did not want to use insecticides of any kind, and did not want to introduce the fire ants in this compost to the soil in our vegetable garden. We eventually gave those bins away.

A friend gave us a large cylindrical compost tumbler that is mounted on a frame and has a handle for turning the compost. We tried it for a season, but the compost became extremely heavy to turn, and inside the tumbler, we must have had too much nitrogen as the finished compost had a sludge-like consistency.

I did some research, hoping to find the most efficient outdoor home composting system, and discovered an excellent comparison study done in 2008 sponsored by the Dave Wilson Nursery with UC Sacramento Master Gardeners, county extension agents, and university farm advisors facilitating the test. They compared 10 different compost bins for greatest efficiency and ease of use. Over 8 weeks, they used the same materials, same time intervals, and evaluated the temperature and air circulation, as well as doing a nutrient analysis of the finished compost. The design that placed first among the ten bins was the Geobin made by Presto. http://geobin123.com/

It is a large, open, standing bin with many circulation holes (no lid). Because of the size (higher mass) and holes for circulation, the compost in the Geobin reached the highest temperature (140 degrees F) of the ten bins, and also broke the material down most efficiently.

Geobin


I purchased this bin and have been very happy with it. The Geobin composts so quickly, it never stays full for more than a day or two. I keep it in the garden next to our deck where my family can easily empty food or garden scraps every night. Other than attracting slugs (usually found where there are large pieces of decomposing plant matter), pests and odor have not been a problem (occasional bees, birds, and butterflies will visit when there is fresh fruit on top). I turn the pile about once a week and so far, the ants and poison ivy have left it alone, probably due to the heat generated inside the bin.

Seeds germinating in fertile compost pile


I wondered at one point last year how to get the finished compost out of the bottom of this large bin if I didn't want to wait until the entire pile had decomposed. I decided to simply lift it up to see if it could be easily moved once compost was in it. To my surprise, the compost stayed in place while I relocated the bin. The majority of the material was fresh at the time this picture was taken, so it held its form perfectly (no spilling over).

Compost heap holding its shape after moving the Geobin (summer 2013).

This material turned into beautiful, rich dark compost in less than 6 months. 


March 2014 - The lower, finished part of this pile consists of the grass clippings, etc., from the previous summer.
 
I used a pitch fork to transfer the unfinished material back to the relocated bin, and was able to use the finished compost at the bottom for garden beds. It was a much easier process than I expected. 


Finished compost ready to add to the garden


Compost applied to the tomato beds


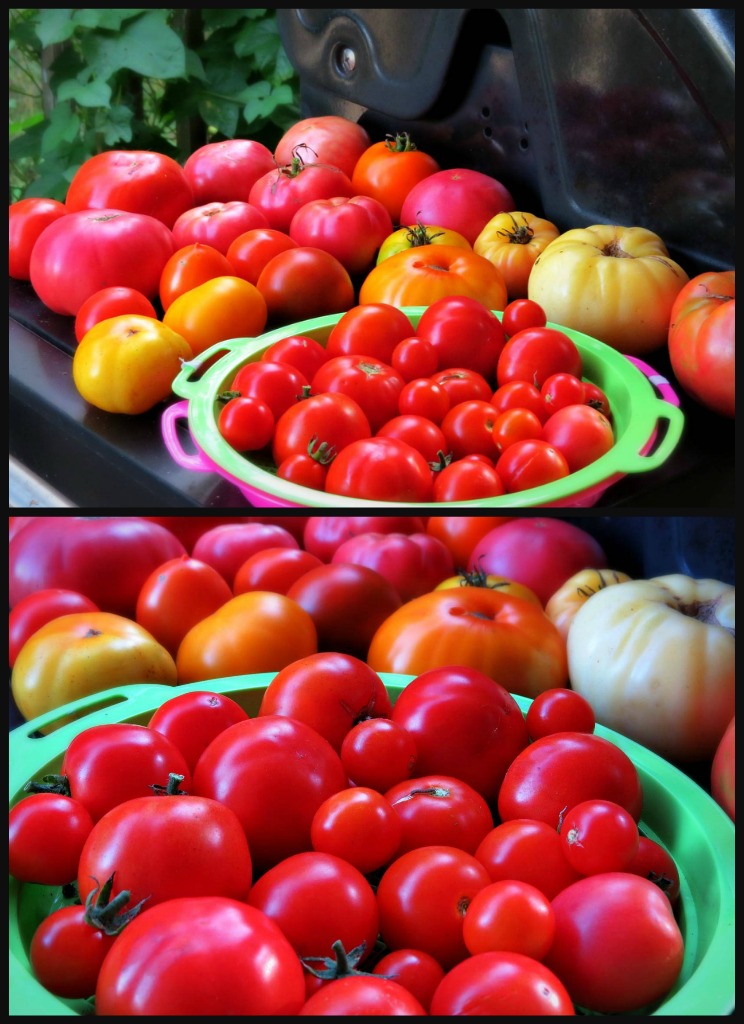
The Geobin made excellent compost in a reasonable amount of time, and I am anxious to see how well our tomatoes will grow in it this year.

The design below was bound to happen when passions of music, gardening, and photography coexist in one mind! 


My musikgarten


Please stay tuned for part two of this blog series when I share experiences and techniques for indoor composting. 

Blessings on your gardens! 
~Karen

Friday, March 7, 2014

The Bird Food Garden

Many gardeners enjoy bird watching and reaping the benefits the birds provide by keeping populations of insect pests under control.  To attract birds to the garden, it helps to provide water for drinking and bathing, as well as a supply of wild bird seed to supplement their diet. 


Homemade trail mix

I found that the many bird visitors to my feeders were eating faster than I could keep the containers filled, so I decided to do an experiment, and hopefully, save some time and money.

Empty feeders after 2 days


I let the seed that fell from the feeders germinate and grow around the poles and feeders. I never prepared the ground or watered the seedlings – I just let nature take its course and didn’t interfere by mowing or weeding that small patch of sprouting millet, safflower, corn, and sunflowers. 


It created a bit of a messy garden spot for a season, but it was definitely worth it to have back-up food available when the feeders were empty, and to see the birds enjoying their organic seed buffet.


Green buds full of seeds


Cardinal snacking in the rain


Still visiting in fall


Bursting with seeds

Leftover seeds for the winter


Providing bird seed through the year at no extra cost was effortless and rewarding! 

Many blessings to you, garden friends! ~Karen

Friday, January 3, 2014

Homesteading “Light”, Part 2: Winter Garden Beds


I love that we can still enjoy planting and harvesting crops year-round in Georgia (and many other places). It is just a matter of knowing what and when to plant for your growing zone and microclimate of your garden location. In this post, I will discuss cool weather crops I planted in prepared soil beds, rather than bins, and my reasons for including other gardening techniques.
I have thoroughly enjoyed gardening in bins on our deck for several years.  

IMG_8796a
I have also kept a garden plot in our yard for larger, more sprawling crops like melons, cucumbers, beans, etc. Last year, I wanted to experiment with growing unusual varieties of tomatoes, cukes, melons, beans, and heirloom flowers. I like the convenience of being able to pick fresh garden produce right outside the kitchen door while preparing meals (which the deck garden has provided). When I needed more space for the new varieties, my husband and I extended the growing space to surround the deck. I marked the new garden spaces by arranging a brick border, then we tilled up the

IMG_4050aIMG_4361a
lawn and added some fencing, creating another small garden at the bottom of our deck stairs. Here we enjoyed a season of tomatoes and beans surrounded by a border of marigolds and sweet basil (which helped to deter some garden pests).

IMG_4306a

IMG_4309a

IMG_4310a
When the warm temperatures ended, I decided to plant some cool-weather crops. In our growing zone, crops that have survived the winter (for us) are broccoli, cauliflower, cabbage, garlic, onions, celery, Swiss chard, kohlrabi, perennial herbs, and lettuce, to name a few. Planting these required only moderate preparation; I removed debris from the previous crop since pests might overwinter in the soil (also a good reason to rotate crops),
 
IMG_6535a
and added some composted horse manure from a nearby stable, then raked leaves into a garden wagon and covered the beds with the leaves.

IMG_7166a
 
 
IMG_6694a
 
I put several bales of wheat straw around the beds to make some obvious paths for walking which kept the soil in the beds from being disturbed or compacted.
 
IMG_6502a
 
 
IMG_8858a
 
The organic matter caused the earthworm population in these beds to multiply, adding beneficial worm castings to the soil. The only downside of this practice was the increase in the slug population in the soil - more on that in a future post. Overall, the soil was rich in beneficial microorganisms and it produced healthy vegetable crops all year long.
 
IMG_8861a
 
 
IMG_7482ab
 
 
IMG_8876a
 
 
IMG_8414aIMG_3887a
 
broccoli collage a
 
IMG_8716aIMG_8717a
 
IMG_8360aIMG_8361a
It has been wonderful to supplement meals with fresh, organic, non-GMO vegetables for only the cost of seeds and a bit of time and attention. Now to peruse all the seed catalogs to plan for the spring garden!

Blessings to you, dear garden friends!
~Karen